Uncategorized
How to Digitize for Embroidery: The Complete Beginner to Professional Guide
Introduction:
Ever noticed how two embroidered logos on the exact same fabric can look completely different — one crisp and clean, the other messy with loose threads and puckered edges? That difference almost never comes down to the embroidery machine. It comes down to digitizing.
Digitizing is the step most people skip over in their heads when they think about embroidery. They picture a logo, they picture a finished shirt, and they assume the machine just “figures it out.” It doesn’t. Somewhere between the artwork and the fabric, a real, technical process has to happen — one that decides exactly where every single stitch goes, in what order, at what angle, and with how much thread.
Whether you’re producing uniforms for a growing business, embroidered merch for an event, or one-off personalized gifts, the quality of your final product is decided long before the needle ever touches fabric. It’s decided at the digitizing stage.
This guide walks through everything worth knowing about embroidery digitizing — from the absolute basics up to the finer technical details that separate a hobbyist file from a production-ready one. Along the way, we’ll also look at why more brands, embroidery shops, and apparel businesses are choosing to outsource this step to specialists like Paw Digitizing rather than trying to handle it in-house.
What Does It Mean to Digitize for Embroidery?
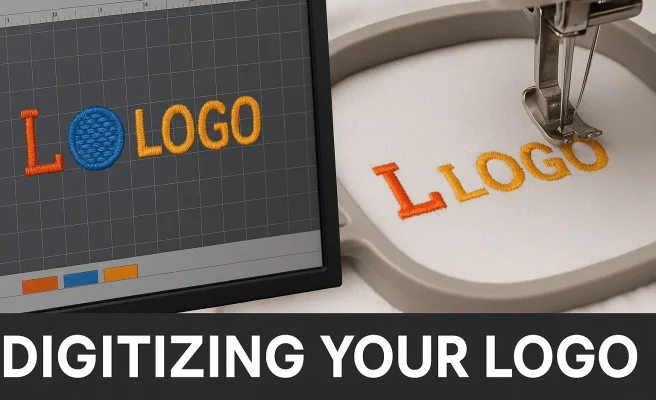
At its core, digitizing is the process of converting a piece of artwork — a logo, a slogan, an illustration, anything — into a stitch file that an embroidery machine can actually read and execute.
This is a bigger jump than it sounds like. A regular image file, whether it’s a JPG, PNG, AI, or SVG, is made of pixels or vector shapes. An embroidery machine has no idea what to do with any of that. It needs a completely different kind of file — formats like DST, PES, EXP, JEF, or VP3 — that spell out, stitch by stitch, exactly what the machine should do.
A digitizer’s job is to build that instruction set from scratch. That means deciding:
- Where each stitch starts and stops
- Which direction the stitches run in
- The angle of each stitch
- How dense the stitching should be
- What kind of underlay is needed underneath
- The order in which thread colors are applied
- Where the machine should trim and move on
None of this is guesswork. It’s closer to engineering than art, even though the end result looks like art.
A helpful way to think about it: embroidery digitizing is a lot like architectural drafting. Nobody starts constructing a building by just stacking bricks and hoping for the best — there’s a blueprint first, with every measurement worked out in advance. Embroidery works the same way. The stitch file is the blueprint, and the embroidered result is the building.
Why Digitizing Quality Matters More Than You Think
It’s easy to assume that if you spend enough money on a good embroidery machine, quality problems will sort themselves out. In practice, the digitizing file has far more influence over the final result than the hardware does.
Here’s what good digitizing actually gets you:
Cleaner, more consistent stitches. When stitch paths and density are properly planned, the coverage looks even and the outlines stay sharp instead of blurry or jagged.
Fewer thread breaks and interruptions. A well-optimized stitch path avoids unnecessary jumps and trims, which means fewer stoppages during production and less troubleshooting on the shop floor.
Faster turnaround. Machines run through a well-planned file more efficiently, which directly affects how many pieces you can produce in a day.
Less wasted material. Sloppy digitizing tends to show up as distorted logos, puckered fabric, or misaligned stitching — all of which usually means scrapped garments, wasted thread, and lost time.
A better impression on your customers. For a business, embroidery is often the first physical thing a customer touches — a cap, a polo shirt, a jacket. Clean, professional stitching quietly signals that the rest of the business is run the same way.
If you’re producing uniforms or promotional apparel regularly, investing in genuinely custom digitizing — rather than relying on quick automated conversions — tends to pay for itself fairly fast, both in production quality and in avoided rework.
The Embroidery Digitizing Process, Step by Step
A lot of beginners assume you can drop a logo into some software, click a button, and get a finished stitch file. That’s rarely true for anything beyond the simplest shapes. Here’s what actually happens during professional digitizing.
Step 1: Studying the Artwork First
Before any stitching decisions get made, the digitizer looks closely at the artwork itself:
- How complex is the design?
- Are there small details that might not translate well into thread?
- How small is the text, and will it still be legible once stitched?
- How many colors are involved?
- Are the shapes accurate and clean, or do they need cleanup?
- What fabric will this design eventually sit on?
A logo that looks flawless on a monitor doesn’t always translate directly to fabric. Fine details that are crisp in a vector file can turn into a blob of thread if they’re not adjusted beforehand.
Step 2: Choosing the Right Stitch Types
Not every part of a design should be stitched the same way. A digitizer maps different elements to different stitch types based on size and purpose:
| Design Element | Typical Stitch Used |
|---|---|
| Large filled shapes | Fill Stitch |
| Thin outlines | Running Stitch |
| Bold lettering | Satin Stitch |
| Decorative borders | Running or Satin |
| Detailed textures | Combination of stitches |
Getting this mapping right has a direct effect on both how the finished design looks and how long it takes to produce.
Step 3: Building the Underlay
Underlay is the invisible foundation stitched beneath the visible design. It’s easy to overlook because you’ll never actually see it in the finished product, but it does a lot of quiet work:
- Stabilizes the fabric so it doesn’t shift mid-stitch
- Prevents the top stitches from sinking into the fabric
- Improves overall stitch coverage
- Reduces puckering around edges
- Adds durability so the design holds up through washing and wear
Skipping underlay is one of the fastest ways to end up with embroidery that looks fine fresh off the machine but falls apart or distorts after a wash or two — especially on stretchy fabrics like performance polos or fleece.
Step 4: Setting Stitch Density
Density is a balancing act. Pack in too many stitches and the fabric stiffens up, thread breaks become more frequent, and the design can even pucker from the sheer weight of thread. Too few stitches, and the base fabric peeks through, leaving the design looking thin and unfinished.
Getting density right depends on several factors working together:
- The type of fabric being used
- The thickness of the thread
- The needle size in use
- How complex or detailed the design is
This is one of the clearest places where the gap between amateur and professional digitizing shows up — density that “looks right” on a screen preview doesn’t always behave the same way once it hits real fabric.
Step 5: Fine-Tuning Stitch Direction
Small adjustments to stitch angle can add a surprising amount of depth and texture to a design. Take a simple embroidered flower as an example:
- The petals might run at a 45-degree angle
- The leaves might run at 90 degrees
- The center might use a radial stitch pattern
None of these choices are visible as “settings” to the end customer — they just perceive the finished flower as looking more three-dimensional and polished than a flat, single-direction version would.
The Three Core Stitch Types
Almost every embroidered design, no matter how complex, is built from combinations of three fundamental stitch types.
Running Stitch
Running stitches are the go-to choice for fine, delicate work — thin outlines, small lettering, subtle decorative accents. Because they use relatively little thread per area covered, they’re also fast to produce and cost-effective at scale.
Satin Stitch
Satin stitches produce that smooth, slightly glossy look you’ll recognize from most professional logo embroidery. They’re the standard choice for:
- Company logos
- Monograms
- Names on uniforms
- Borders
- Medium-sized lettering
Satin stitching is popular specifically because it gives crisp, clean edges and a premium finish — which matters a lot when a logo is representing a brand.
Fill Stitch
Fill stitches are built for covering ground efficiently, which makes them the standard for larger design areas like:
- Jacket backs
- Oversized logos
- Sports team emblems
- Mascots
- Decorative artwork spanning a wide area
A good digitizer won’t just fill a large area with stitches running in one flat direction — they’ll vary the angle across different sections to keep the design from looking flat or lifeless, adding subtle visual interest without changing the actual artwork.
Matching Your Design to the Right Fabric
Fabric choice quietly shapes almost every decision made during digitizing. A design built for stiff denim will behave very differently on stretchy performance wear or delicate knit fabric. Stretch fabrics generally need more underlay and slightly lower density to avoid puckering, while stable fabrics like canvas or twill can usually handle denser, more detailed stitching without issue. Skipping this consideration is one of the more common reasons a design that looked perfect on one product suddenly looks wrong on another.
Common Digitizing Mistakes That Ruin Good Artwork
Even well-designed logos can end up looking rough once stitched, usually because of a handful of recurring mistakes:
- Ignoring underlay entirely, leading to shifting fabric and distorted shapes
- Using flat, single-direction fill stitches on large areas, making designs look lifeless
- Overcrowding small text with too much detail, causing letters to blur together
- Setting density without accounting for the specific fabric being used
- Relying on push-button auto-digitizing for anything beyond a very simple shape
Most of these issues are avoidable with manual review and adjustment — which is exactly the value a trained digitizer adds over automated tools.
Professional Digitizing vs. Auto-Digitizing Software
Auto-digitizing software has come a long way, and for very simple designs — a basic circle, a plain block letter — it can produce usable results quickly. Where it consistently struggles is with anything that has fine detail, small text, gradients, or complex shading. Automated tools tend to apply generic rules across the whole design, without adjusting for the specific quirks of that artwork or the fabric it’s headed for.
Manual, professional digitizing takes longer upfront but tends to save time overall, since it avoids the trial-and-error of stitching out a flawed auto-digitized file, spotting the problems, and sending it back for rework.
Choosing Embroidery Digitizing Software
For anyone digitizing in-house, the software matters, but experience matters more. Popular industry options include Wilcom, Hatch, Embrilliance, and Tajima’s own suite — each with strengths depending on whether you’re focused on complex commercial work or simpler small-batch jobs. That said, even the best software still requires a human who understands stitch behavior, fabric response, and machine limitations to get consistently clean results.
Why Businesses Trust Paw Digitizing
For businesses that don’t want to build an in-house digitizing team from scratch, working with an experienced digitizing partner is usually the more practical route. Paw Digitizing focuses on exactly the kind of detail-oriented, manual digitizing described throughout this guide — reviewing artwork carefully, selecting appropriate stitch types, building proper underlay, and adjusting density and direction based on the actual fabric a design will be stitched onto.
For embroidery shops, apparel brands, and designers who need reliable, production-ready files without the back-and-forth of trial runs, that kind of dedicated attention is often what separates a smooth production run from a frustrating one.
Final Thoughts
Great embroidery isn’t an accident, and it isn’t purely a function of expensive equipment either. It’s the result of a careful, technical process that happens before a single stitch is ever sewn — one that accounts for stitch type, density, direction, underlay, and fabric all at once.
Whether you handle digitizing in-house or work with a specialist team, understanding what actually goes into a stitch file makes it much easier to spot quality work — and to know what questions to ask when something doesn’t look right.
